DIY Christmas Ball Wreath - Felt Craft
Christmas wreaths are a wonderful style to decorate for the holidays. One of the best features of wreaths is that they are so individual, so unique, and so unlike! Sure, the shape is (generally) a circle, only above and beyond that, Christmas wreaths take any number of forms.
 View in gallery
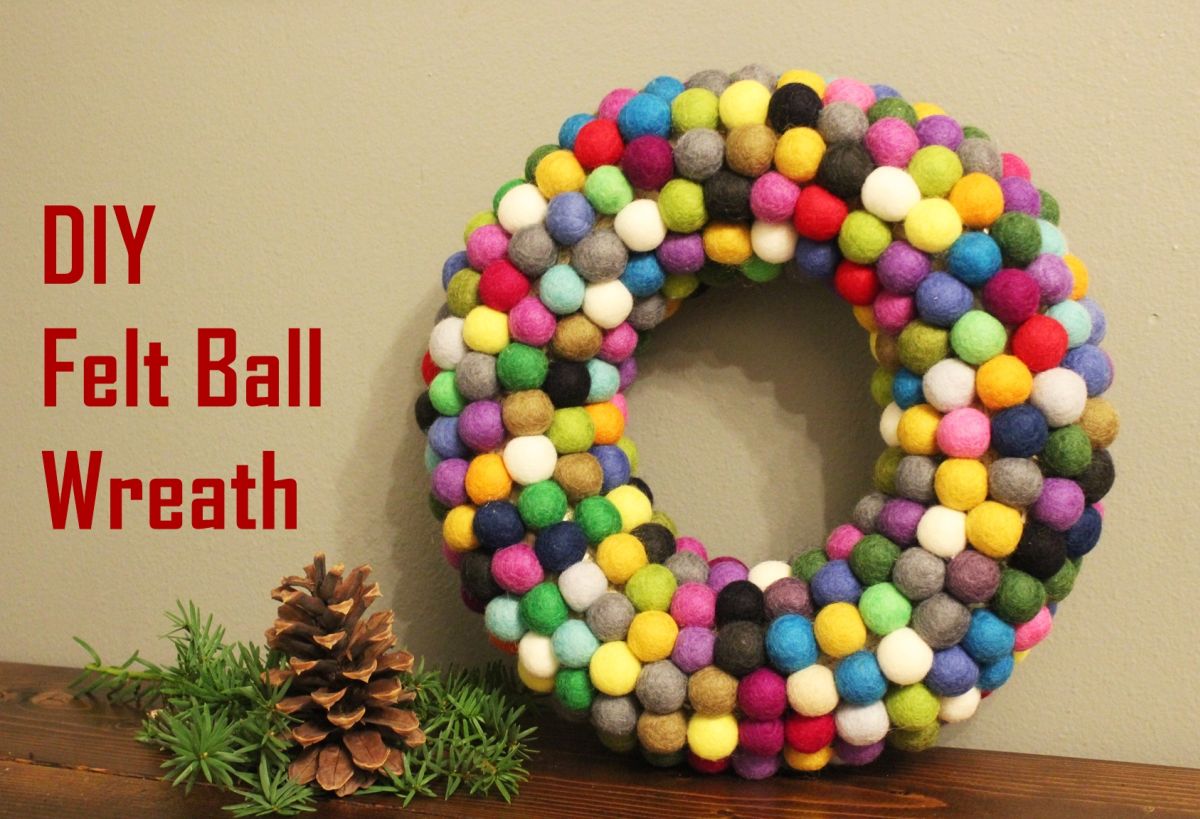
 This DIY felt ball wreath is a favorite this flavour – its multicolored nature is non-traditional, and the simplicity quite mod. Here's how to brand your ain DIY felt brawl wreath this vacation flavour.
 View in gallery
 Materials y'all'll needed for Christmas Ball Wreath:
- Felt balls (tutorial uses 300 felt balls, approximately 1" in bore)
- Heavy duty thread
- Large needle
- 12" straw wreath (not shown)
- Hot mucilage gun + hot glue sticks
- Twine for hanging the wreath
Footstep by step instructions to craft the Christmas Wreath:
 View in gallery
 You lot could actually use any type of thread/string/line that you feel would exist strong and "invisible" enough for this project. Because the felt assurance are multi-colored, I went with black heavy duty thread.
 View in gallery
 Thread the needle with near eight' of thread (doubled over, the thread line will be most 4'). Tie a double knot at the end of the thread line.
 View in gallery
 Selecting felt assurance at random, stick the needle through each ball direct through the center.
 View in gallery
 Push the felt balls next to each other, merely don't pull the thread taut. You will want a piffling wiggle room to be able to movement the felt balls 1/viii" or 1/4″ equally needed when yous go to attach them to the wreath class.
 View in gallery
 When you become almost vi" from the center of your needle, tie off the thread in another double knot. Cutting the thread.
 View in gallery
 Repeat these steps until you have threaded all of your felt balls. The reason yous're threading them is so that they stay together when it comes time to attach them to the straw wreath. Not simply volition it go faster to attach them when they're already strung together, simply the felt balls will too stay on the wreath form much better when they're hooked to their neighbors rather than flying solo.
 View in gallery
 Tie twine, string, wire, or whatever you want effectually the straw wreath before yous attach whatever felt balls to it. Glue the hanging device (e.chiliad., twine) downward and then it doesn't pull up on the felt assurance when the wreath is hanging up.
 View in gallery
 Along the ridge of the dorsum of your wreath, run a generous bead of hot glue well-nigh 6" long.
 View in gallery
 Set the mucilage gun aside, and press the felt balls into the straw wreath for almost 5-10 seconds before moving onto the next 6" on your felt ball strand.
 View in gallery
 Go on circling this back ridge until y'all've covered the entire circumference of the wreath back. Y'all don't demand to mucilage felt balls onto the back of the wreath, and so choose the "ridge" line that'south as far toward the dorsum as possible while nonetheless allowing the wreath to lie apartment on its back.
 View in gallery
 You will likely have some length of your strand left with felt balls on it. Yous'll continue this gluing procedure, placing these felt balls onto the next ring of felt assurance, toward the front of your harbinger wreath.
 View in gallery
 Run a generous bead of hot glue about 1/2″ away from the first ring of felt assurance. Y'all want to aim then the center of the next ring of felt assurance hits the gum while their sides affect the first ring as well.
 View in gallery
 Place, then printing, the second ring of felt assurance. Proceed in this style for the entire 2d band of felt assurance. If you reach the end of a strand of felt assurance, simply secure the end felt ball in place then generously mucilage the first felt ball correct side by side to information technology. String should be invisible.
Continue the second ring, so repeat the process for the third ring…and so on until you lot've covered the entire harbinger wreath's confront.
 View in gallery
 When you become to the "top" of the face up of the wreath, you may find it easier to lay the straw wreath downwards flat to attach the felt balls. You will likely take to stand it on its side when yous reach the center section of the wreath with the felt ball strands.
 View in gallery
 Securely glue down the last felt ball on the back of the wreath. Double check all felt balls to brand sure they're secure. Add gum and printing down anywhere that needs additional mucilage support. Note: Don't try to mucilage the felt balls to each other. It doesn't really work. Only gum them to the straw wreath.
 View in gallery
 Your goal is to have the felt balls reach far enough toward the dorsum of your straw wreath that the wreath class isn't visible around the inside or outside ridges.
 View in gallery
 And there you get. A very happy, mod, multi-colored felt brawl wreath.
 View in gallery
 Of form, you could cull simply blood-red, white, and green felt balls if you wanted it specifically Christmas colored. Or any colors you like for the holiday season.
 View in gallery
 You'll detect that, if you expect hard, you lot can see the harbinger wreath between some of the felt balls. Don't worry well-nigh this too much; when the wreath is completed, that volition become a negligible item.
 View in gallery
 If your Christmas season is half as endearing as this DIY felt ball wreath is, you're going to have a wonderful holiday.
Merry Christmas.
Source: https://www.homedit.com/christmas-felt-ball-wreath/
0 Response to "DIY Christmas Ball Wreath - Felt Craft"
Post a Comment